
So, you’ve got an idea for a website. Maybe it’s a business site, a portfolio, an e-commerce store, or a passion project. Whatever it is — that spark of an idea is just the beginning. The real magic happens in the website development process: a structured, creative, and sometimes challenging journey that transforms your vision into a fully working digital product.
In this guide, we’re going to walk through every stage of that journey in a friendly, practical way. Whether you’re a business owner commissioning a site, a designer expanding your knowledge, or a developer looking for a cleaner workflow — this is your complete roadmap.
Let’s dive in. 🚀


What Is the Website Development Process?
The website development process is the complete sequence of steps — from initial concept to public launch — that a team (or solo developer) follows to build a website. It combines strategy, design, coding, testing, and deployment into one cohesive workflow.
According to the W3C (World Wide Web Consortium) and industry standards from Google’s Web Fundamentals, a well-structured development process reduces errors, saves time, and produces better outcomes for users.
Think of it like building a house. You wouldn’t start laying bricks before you had a blueprint. The same logic applies here.
Why Following a Structured Web Design Process Steps Actually Matters
Skipping steps might feel like saving time — but in practice, it almost always costs more time later. Here’s why a structured approach pays off:
- Fewer revisions — When goals are defined early, everyone stays aligned
- Better user experience — UX research shapes decisions before a single pixel is designed
- Faster launch — A clear website project timeline keeps teams on track
- Higher quality output — Testing catches issues before users do
According to Clutch’s Web Design Survey, businesses that followed a defined development process were significantly more satisfied with the final result than those who didn’t plan ahead.
Now let’s get into the actual steps.
Step 1 — Discovery and Briefing: Where Every Great Website Begins
Every successful website development process starts with a clear idea — but ideas alone don’t build results.
The discovery phase is where you ask the big questions:
- What is the purpose of this website? (sell, inform, generate leads, entertain?)
- Who is the target audience?
- What does success look like?
- What’s the budget and timeline?
- Who are the competitors?
This phase results in a creative brief — a document that guides every decision moving forward. It defines the website project timeline, identifies key stakeholders, and sets expectations.
Pro tip: The more thorough your brief, the fewer surprises you’ll face later. Teams that invest time in discovery avoid costly redesigns down the road.
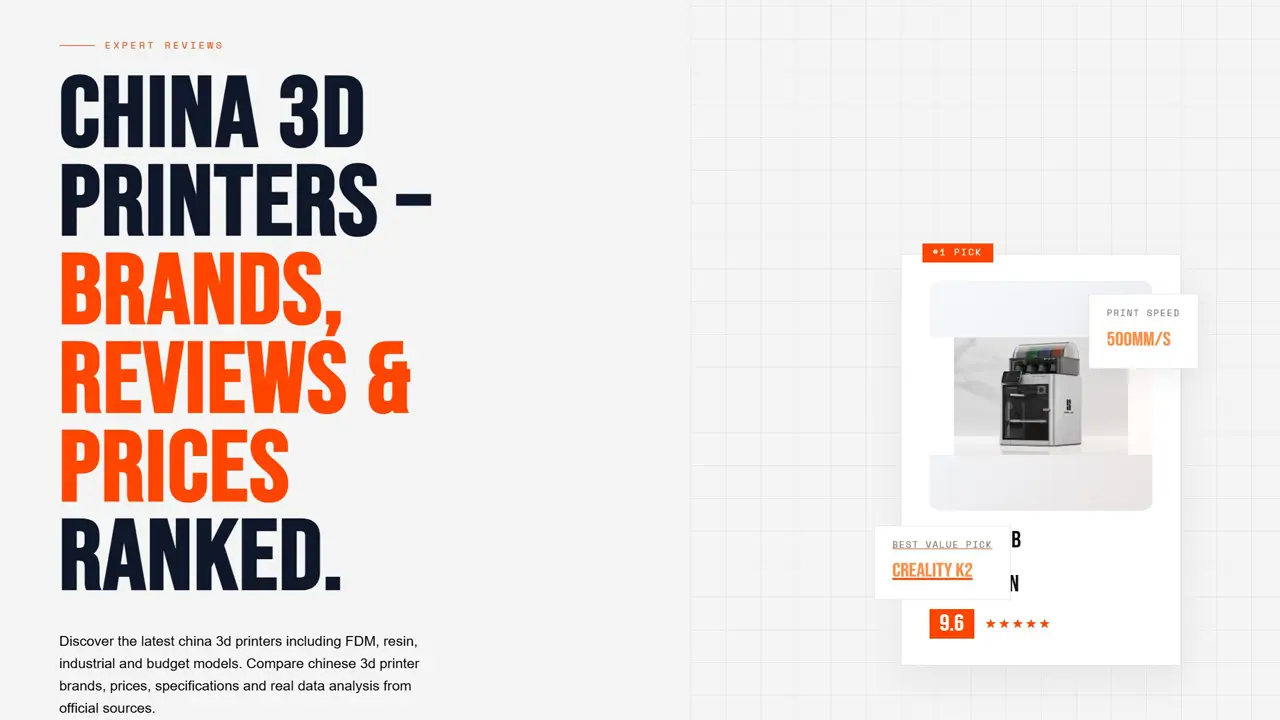
BestChina3DPrinters.com
Your trusted guide to Chinese 3D printers. Expert reviews, comparisons, and recommendations for FDM and resin printers from top brands like Creality, Anycubic, Flashforge, and more.
- • Expert Reviews & Guides
- • Price Comparisons
- • Discount Codes & Deals
- • Beginner-Friendly Tips
Step 2 — Research and Strategy: Building the Foundation Smartly
Next comes the research phase, shaping the UX UI design process and understanding user behavior.
This step is all about learning — about your users, your market, and your content. Great websites aren’t built on assumptions. They’re built on data.
What happens during research:
- User research — Surveys, interviews, and analytics review to understand who your visitors are and what they need
- Competitive analysis — Studying what works (and doesn’t) on competitor sites
- Content audit — If redesigning, reviewing what content exists and what needs to be created
- SEO keyword research — Identifying terms like website development process, web design stages, and how to build a website step by step that real users search for
According to the Nielsen Norman Group, user research at the beginning of a project is the single most cost-effective investment in the web design process. Problems found during research cost a fraction of what they cost to fix after launch.
Step 3 — Planning and Website Project Timeline
With research in hand, it’s time to plan. This stage creates the structural backbone of your project.
Key deliverables in planning:
- Sitemap — A visual map of all pages and how they connect
- Content plan — What content goes on each page, who writes it, when it’s due
- Technology stack decisions — Which CMS, framework, or platform will be used
- Website project timeline — Realistic deadlines for each phase
Here’s a sample timeline structure for a medium-sized website project:
| Phase | Activities | Typical Duration |
|---|---|---|
| Discovery & Brief | Meetings, brief creation, goal setting | 1–2 weeks |
| Research & Strategy | User research, competitive analysis, SEO | 1–2 weeks |
| Planning | Sitemap, content plan, tech decisions | 1 week |
| Wireframing | Low/high-fidelity wireframes | 1–2 weeks |
| Visual Design | UI design, style guide, prototyping | 2–4 weeks |
| Development | Front-end & back-end coding, CMS setup | 4–8 weeks |
| Testing & QA | Functionality, performance, browser testing | 1–2 weeks |
| Launch | Final checks, go live, monitoring | 1 week |
These timelines vary based on project complexity, team size, and client feedback speed. But having a plan — even a flexible one — is always better than no plan at all.
Step 4 — Wireframing: The Blueprint of Your Website
We move into wireframes — the backbone of any website wireframe process, where structure comes first.
Wireframes are simple, low-detail sketches (digital or on paper) that show the layout and structure of each page — without colors, fonts, or imagery. Think of them as architectural floor plans for your website.
Why wireframes matter:
- They help teams agree on structure before investing time in visuals
- They expose navigation and usability problems early
- They give content creators a clear target for writing
Types of wireframes:
- Low-fidelity — Basic boxes and lines, quick to produce, used for early ideation
- High-fidelity — More detailed layouts with real content areas, closer to the final design
Popular tools for wireframing include Figma, Adobe XD, and Balsamiq — all widely used by professional design teams worldwide.
The Interaction Design Foundation emphasizes that wireframes reduce design risk significantly because they make it cheap and fast to test ideas before committing to them.
Step 5 — Visual Design and the UX UI Design Process
Then comes visual magic: the web design stages transform structure into a compelling interface.
This is where your website starts to look and feel like itself. The visual design phase takes the wireframe structure and applies:
- Color palette — Based on brand guidelines or newly created
- Typography — Font choices that balance readability and personality
- Imagery and iconography — Photos, illustrations, icons
- Spacing and layout — Visual hierarchy that guides the eye naturally
- Interactive states — Hover effects, button states, transitions
The UX UI design process here isn’t just about aesthetics. It’s about function. Good UI design guides users effortlessly. Great UX design means users achieve their goals without frustration.
Key UX principles applied at this stage (sourced from Nielsen Norman Group):
- Visibility of system status
- Match between system and the real world
- User control and freedom
- Consistency and standards
- Error prevention
- Recognition rather than recall
- Flexibility and efficiency of use
- Aesthetic and minimalist design
Designs are typically delivered as interactive prototypes — clickable mockups that simulate the real website experience before a single line of code is written.
Step 6 — Front End Development Process: Turning Design Into Reality
With design approved, developers begin the front end development process, turning pixels into reality.
Front-end development is everything the user sees and interacts with in their browser. It’s where design files become real, working web pages.
Core technologies in front-end development:
- HTML (HyperText Markup Language) — Structures the content
- CSS (Cascading Style Sheets) — Controls visual presentation
- JavaScript — Adds interactivity and dynamic behavior
Modern front-end development also involves frameworks and tools:
| Category | Popular Tools / Frameworks | Purpose |
|---|---|---|
| CSS Frameworks | Bootstrap, Tailwind CSS | Responsive layout, styling utilities |
| JS Frameworks | React, Vue.js, Angular | Dynamic UI components |
| Build Tools | Webpack, Vite | Code bundling and optimization |
| Version Control | Git, GitHub, GitLab | Code management and collaboration |
| CMS Integration | WordPress, Webflow, Contentful | Content management for editors |
| Performance | Lighthouse, PageSpeed Insights | Speed and Core Web Vitals auditing |
Responsiveness is non-negotiable in this phase. According to Statista, mobile devices account for over 58% of global web traffic. Every modern website must work flawlessly on phones, tablets, and desktops alike.
Step 7 — Full Website Creation Workflow: Integrations and Performance
The full website creation workflow continues with integrations, responsiveness, and performance tuning.
Beyond the visible front end, a website usually requires back-end infrastructure and third-party integrations. This is where the pieces all connect.
Common integrations in the website creation workflow:
- Analytics — Google Analytics 4, to track user behavior
- CRM tools — HubSpot, Salesforce, for capturing and managing leads
- E-commerce — Stripe, WooCommerce, Shopify APIs for payment processing
- Email marketing — Mailchimp, Klaviyo integrations
- SEO tools — Schema markup, sitemap generation, meta tag management
- Security — SSL certificates, HTTPS configuration, security headers
Performance optimization also happens here. According to Google’s Web Vitals documentation, the key performance metrics that affect both user experience and search rankings are:
- LCP (Largest Contentful Paint) — How fast the main content loads (target: under 2.5 seconds)
- FID / INP (Interaction to Next Paint) — How quickly the site responds to user input
- CLS (Cumulative Layout Shift) — How stable the layout is during loading
Optimizing images, enabling caching, using Content Delivery Networks (CDNs), and minimizing unnecessary scripts all contribute to a fast, high-performing website.
Step 8 — Testing and Quality Assurance: Nothing Goes Live Untested
Testing ensures everything works — a critical part of website design to launch preparation.
This phase is where you catch problems before your users do. A thorough QA process covers multiple testing categories:
Functional testing — Does everything work as expected?
- All forms submit correctly
- Links go to the right pages
- CTAs trigger the right actions
- Search functionality returns correct results
Cross-browser testing — Does the site look and work correctly across different browsers?
- Chrome, Firefox, Safari, Edge — all render pages differently
- Browser compatibility tools like BrowserStack help automate this
Device and responsiveness testing — Does it work on all screen sizes?
- Phones (small and large), tablets, laptops, desktop monitors
Performance testing — Is it fast enough?
- Google PageSpeed Insights, GTmetrix, and WebPageTest provide performance scoring
Accessibility testing — Can everyone use it?
- The Web Content Accessibility Guidelines (WCAG 2.1), published by the W3C, define the international standard for web accessibility
- Tools like axe and WAVE help identify accessibility issues
Security testing — Is it protected?
- SSL properly configured
- No exposed sensitive data
- Forms protected against spam and injection attacks
| Test Type | What’s Checked | Recommended Tools |
|---|---|---|
| Functional | Forms, links, buttons, navigation | Manual testing, Selenium |
| Cross-browser | Rendering in different browsers | BrowserStack, LambdaTest |
| Responsive | Layout on all screen sizes | Chrome DevTools, Responsively |
| Performance | Speed, Core Web Vitals | Lighthouse, GTmetrix |
| Accessibility | WCAG compliance, screen readers | axe, WAVE, Accessibility Insights |
| Security | SSL, headers, form protection | SSL Labs, OWASP ZAP |
| SEO | Meta tags, structured data, sitemap | Screaming Frog, Google Search Console |
Don’t rush this phase. A good QA process is the difference between a professional launch and an embarrassing one.
Step 9 — Website Launch Checklist: Pre-Flight Before You Go Live
Before going live, we finalize everything using a detailed website launch checklist.
This is your final quality gate. No matter how confident you are in the build, a structured checklist prevents costly oversights. Here’s a comprehensive pre-launch checklist based on industry best practices:
Technical checks:
- All pages return 200 status (no broken links or 404 errors)
- SSL certificate installed and HTTPS enforced across all pages
- Redirects properly set up (especially if migrating from an old site)
- Robots.txt file configured correctly
- XML sitemap created and submitted to Google Search Console
- Page speed scores acceptable (LCP under 2.5s on mobile)
- Favicon and browser tab title set correctly
Content checks:
- All placeholder text (“Lorem ipsum”) replaced with real content
- Images optimized (compressed, correct alt text added)
- All phone numbers, addresses, and contact details verified
- Legal pages present: Privacy Policy, Terms & Conditions, Cookie Notice
- Social media links working and pointing to correct profiles
SEO checks:
- Meta titles and descriptions set for every page
- H1 headings used correctly on every page
- Canonical tags in place where needed
- Open Graph tags set for social media sharing previews
- Structured data markup validated
Analytics and tracking:
- Google Analytics 4 installed and verified
- Google Search Console connected and sitemap submitted
- Conversion tracking events configured (form submits, clicks, purchases)
Backup and security:
- Automated backup system in place
- Security plugin or firewall configured (for CMS sites)
- Admin passwords strong and two-factor authentication enabled
Step 10 — Launch Day and Beyond: Your Website Is Live! 🚀
And finally — launch! Your idea becomes a fully functional product through a structured how to build a website step by step approach.
Launch day is exciting — but it’s also the beginning of a new phase, not the end of the process.
On launch day:
- Push the site live (DNS update, hosting configuration)
- Monitor the site for the first few hours — watch for errors in Search Console and analytics
- Test the live site one more time on real devices
- Announce the launch (social media, email newsletter, press release if applicable)
After launch — ongoing maintenance:
A website is a living product. The best websites are continuously improved based on real user data. Post-launch activities include:
- Performance monitoring — Regular speed and uptime checks
- Content updates — Fresh content improves SEO and keeps users coming back
- Security updates — CMS and plugin updates applied promptly
- Analytics review — Monthly analysis of traffic, behavior, and conversions
- A/B testing — Testing different versions of pages to improve conversion rates
- SEO monitoring — Tracking keyword rankings and adjusting content strategy
According to HubSpot’s Web Strategy Reports, websites that are regularly maintained and updated see significantly better search rankings and user engagement compared to sites left static after launch.
Bringing It All Together — The Complete Web Design Stages at a Glance
| Step | Stage Name | Key Output | Who Leads |
|---|---|---|---|
| 1 | Discovery & Brief | Project brief, goals, audience definition | Project Manager / Client |
| 2 | Research & Strategy | User research, competitive analysis | UX Designer / Strategist |
| 3 | Planning | Sitemap, content plan, timeline | Project Manager |
| 4 | Wireframing | Page layouts, navigation structure | UX Designer |
| 5 | Visual Design | UI mockups, style guide, prototypes | UI Designer |
| 6 | Front-End Development | Working HTML/CSS/JS pages | Front-End Developer |
| 7 | Integrations & Performance | Connected tools, optimized performance | Full-Stack / Back-End Developer |
| 8 | Testing & QA | Bug-free, accessible, fast site | QA Engineer / Full Team |
| 9 | Launch Checklist | Launch-ready, verified site | Project Manager / Developer |
| 10 | Launch & Maintenance | Live site, ongoing improvements | Full Team |
Common Mistakes to Avoid in the Website Development Process
Even experienced teams make these mistakes. Here’s what to watch out for:
Skipping the brief — Without clear goals, the project drifts. Every revision costs time and money.
Underestimating content — Content is often the biggest bottleneck. Plan it early and assign it clearly.
Ignoring mobile from the start — Mobile-first design isn’t optional. Over half of all web traffic is mobile.
Launching without testing — Every untested site has bugs. Every bug damages user trust.
Forgetting about SEO during development — SEO isn’t something you bolt on at the end. It needs to be considered from the planning phase onward.
No post-launch plan — A website without maintenance is a website in decline. Plan for it from day one.
Final Thoughts — Process Is the Foundation of Every Great Website
There’s a reason the world’s best digital agencies, in-house teams, and freelancers follow a structured website development process. It’s not bureaucracy. It’s not overthinking. It’s the professional approach that separates memorable, high-performing websites from forgotten ones.
When you follow the web design process steps outlined in this guide — from a clear discovery brief through research, wireframing, visual design, development, testing, and a thorough website launch checklist — you give your project the best possible chance of success.
Your website is often the first impression your business makes on the world. Make it count.
Follow the process. Build with intention. Launch with confidence. 🚀
Want a website that actually converts, not just looks good?
👉 Start your project today: https://andreevwebstudio.com/
🇬🇧
Excellent article and very professional website! The explanation of the website development process was clear, modern, and easy to follow. Highly recommended for businesses looking for high-quality web design services.
👉 https://andreevwebstudio.com/
🇪🇸
Muy buen artículo y un sitio web realmente profesional. Me gustó la forma en que explican cada etapa del desarrollo web paso a paso. Diseño moderno y contenido útil.
👉 https://andreevwebstudio.com/
🇸🇦
مقال رائع وموقع احترافي للغاية. شرح عملية تطوير المواقع كان واضحًا ومنظمًا بشكل ممتاز. أوصي بهذه الخدمة لأي شخص يريد موقع ويب حديث وفعال.
👉 https://andreevwebstudio.com/
🇨🇳
这篇文章非常专业,网站设计也很现代化。我很喜欢关于网站开发流程的详细讲解,内容清晰易懂,非常适合企业参考。
👉 https://andreevwebstudio.com/
🇫🇷
Excellent article avec un site web très moderne et professionnel. Les étapes du processus de création de site sont bien expliquées et faciles à comprendre.
👉 https://andreevwebstudio.com/
🇩🇪
Sehr informativer Artikel und eine beeindruckende Website. Der gesamte Prozess der Webentwicklung wurde klar und professionell erklärt. Absolut empfehlenswert!
👉 https://andreevwebstudio.com/
